
How do I make and print a calendar?
PubKeep has calendar designs you can fill in. You pick the months, and PubKeep builds the pages with the right days in each one.
Make a calendar
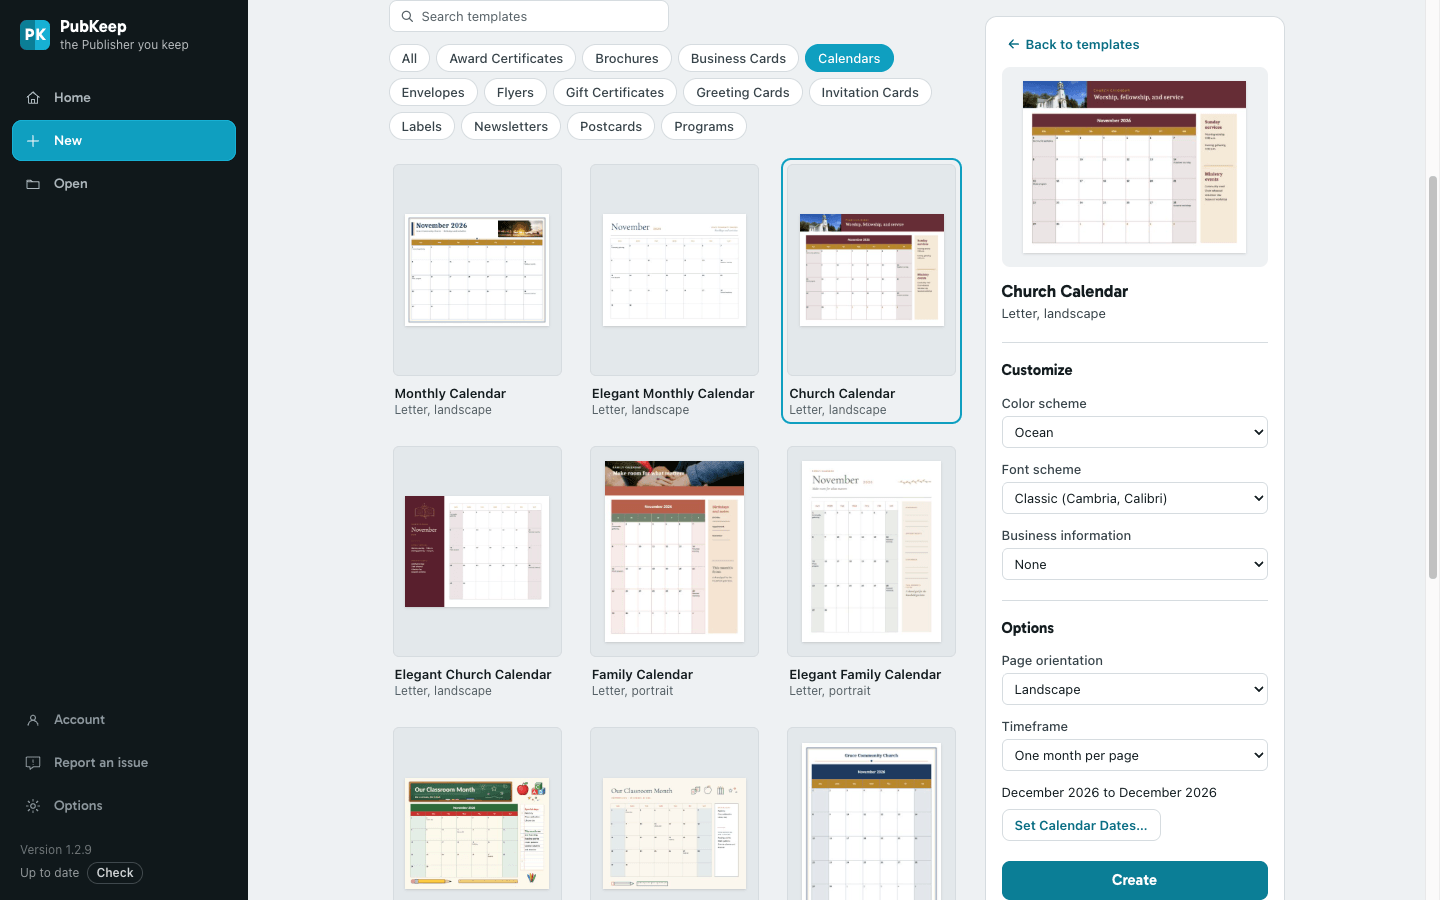
Section titled “Make a calendar”- On the Start screen, click New. If a publication is open, click File > New.
- Click Calendars, then click a design.
- On the right, under Customize, pick a Color scheme and a Font scheme if you like. The design’s own colors keeps the colors you see in the preview.
- Under Options, set Page orientation to Portrait or Landscape.
- Set Timeframe:
- One month per page gives each month its own page.
- One year per page puts twelve months on each page.
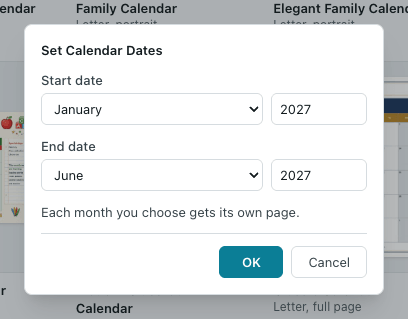
- To choose the months, click Set Calendar Dates…. Pick the Start date and End date, each a month and a year, and click OK.
- Click Create.
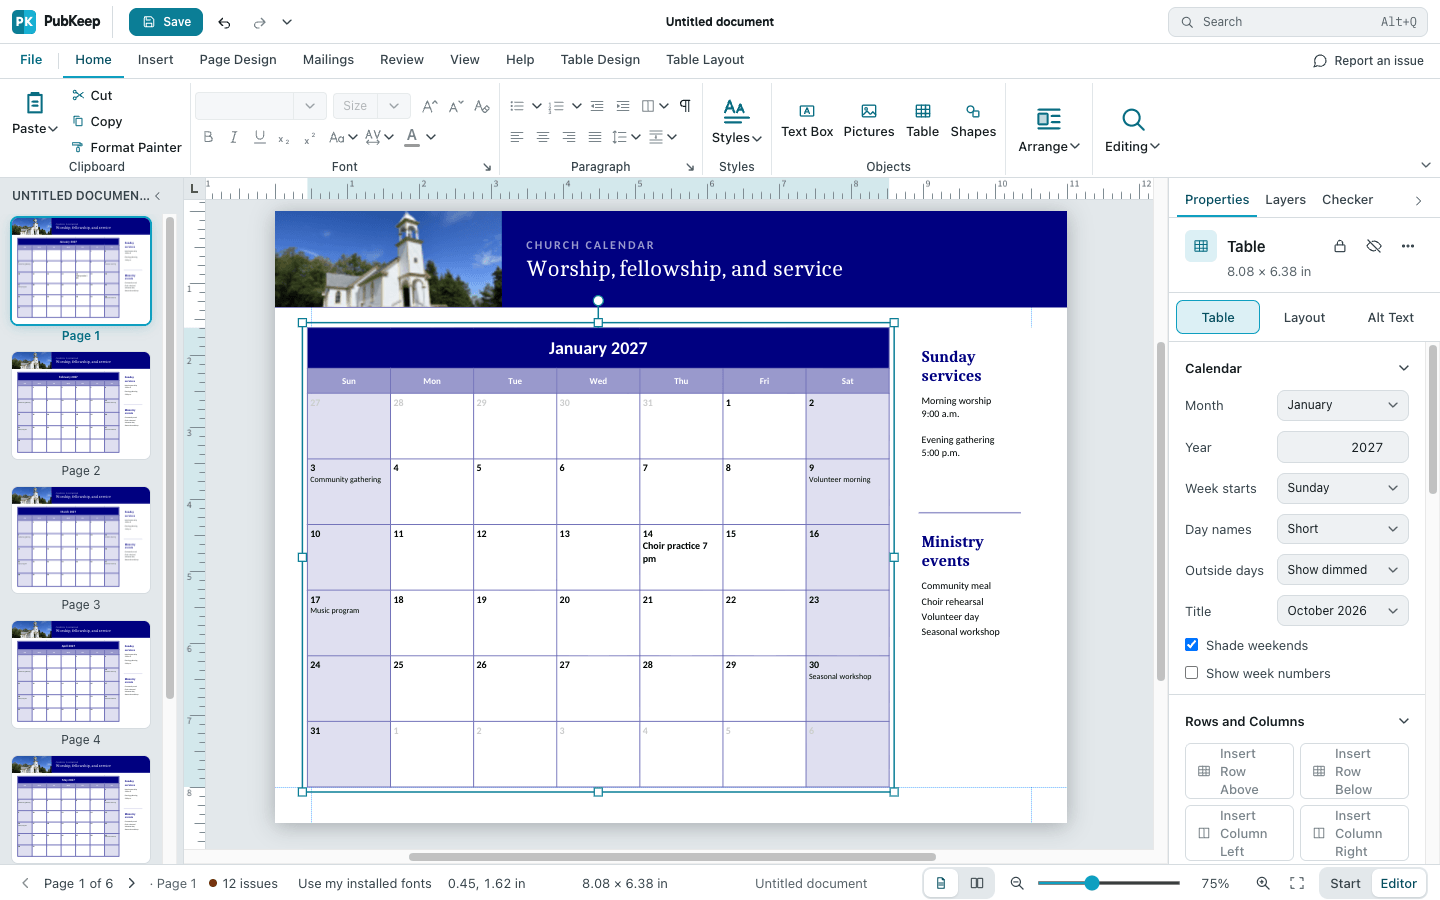
For example, a start date of January 2027 and an end date of June 2027 with One month per page makes a six-page calendar.
Add events to a day
Section titled “Add events to a day”Some designs come with sample events, like “Community gathering”. Click one to change it, or select it and press Delete.
- Click the calendar to select it.
- Click the day’s square to put the cursor in it.
- Press End, then Enter to start a new line under the day number.
- Type the event, like “Choir practice 7 pm”.
Format event text like any other text, with the Home tab.
Add a calendar to a page you already have
Section titled “Add a calendar to a page you already have”To put a month on a newsletter or bulletin page, click Insert > Calendars, then click a design under This month or Next month. See Insert a calendar and change the month.
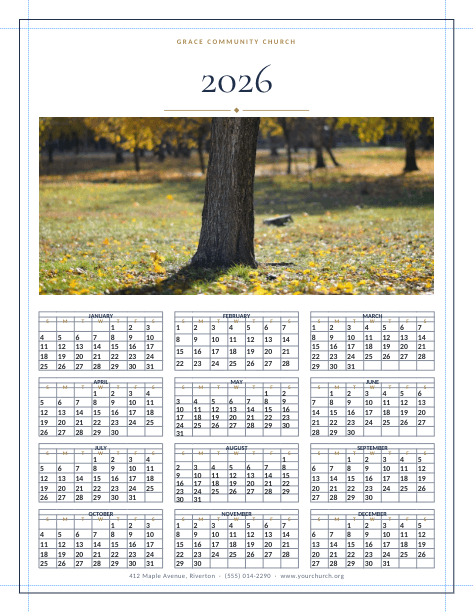
Put a photo above a year calendar
Section titled “Put a photo above a year calendar”A year on one portrait page leaves room at the top for a photo if you move the months down.
- Make a calendar with Page orientation set to Portrait and Timeframe set to One year per page.
- Click January. Hold Shift and click each of the other eleven months.
- On the Home tab, click Arrange > Group.
- In the Properties pane on the right, click Layout. Set Height to about 4.6 in and Vertical to about 5.6 in. The months move into the bottom half of the page.
- Click Insert > Picture Placeholder.
- In the Properties pane, click Layout and clear Lock aspect ratio. Then set Width, Height, Horizontal and Vertical so the placeholder fills the top half, under the title. On a Letter page, try 7.1 in, 3.2 in, 0.7 in and 2.1 in.
- Click Picture Format > Change Picture > Change Picture, then choose your photo.
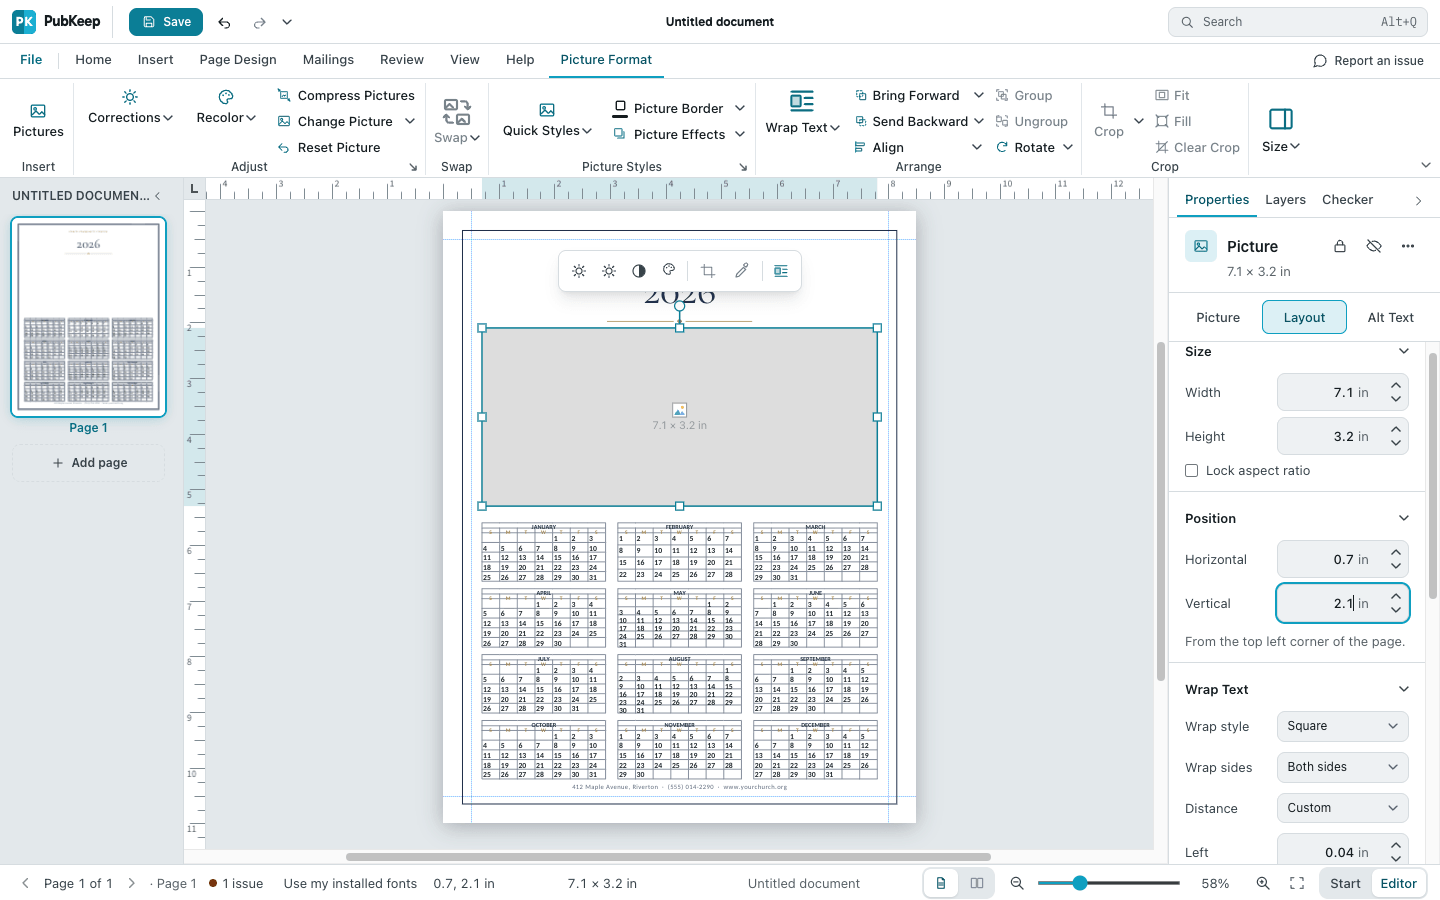
The months get snug when you shrink them. Their text stays the same size, so the month names sit close to the row of day letters. A shorter photo leaves more room for the months.
Print the calendar
Section titled “Print the calendar”- Click File > Print, or press Ctrl+P (Cmd+P on a Mac).
- Under Printer, choose your printer.
- Click Print.
Each page of the calendar prints on its own sheet. To print only some months, see Print some pages or several copies per sheet. To send the calendar to a print shop, save it as a PDF.
Questions
Section titled “Questions”How do I change the month or the first day of the week?
Section titled “How do I change the month or the first day of the week?”Click the calendar, then use the Calendar settings in the Properties pane. See Insert a calendar and change the month.
Where’s the Properties pane?
Section titled “Where’s the Properties pane?”If you don’t see it, click View and check Properties Pane. See A tour of the PubKeep screen.